I put together another progress report video for December 2015. These have proven to be interesting to look over later - seeing where things are to date compared to months back.
I'm pleased with the way things are going at the moment. I also enjoy the fact that I'm starting to set down roots on the layout so I can get moving on more of the scenic side of things.
I have three sections now for the most part:
SHIZUKA - the City section
SOYOKAZE which is broken into a few areas - Soyokaze Harbor, Soyokaze Temple, Soyokaze Village and Soyokaze Hill.
I'm aiming to just work on as much as I can work on when I can work on it. Could be 4 hours (rare) or a few minutes of puttering during a work break, which is far more common.
I've been doing a little city planning in Kiwamura - an area name I'm still making an effort to remember! I'm trying to get the flow right before locking too much down. I did the same thing in the Shizuka section and there were many great things that came out of the process. It's an interesting section to work through. I wanted it to be more modern and a little more boring in certain ways while more interesting in others. The main town area is rather straight forward while the factory area has potential for fun and whimsy. I gave thought to making my Kaiju monster area over in this spot rather than in the subway section. I'm going to scale the monster down and plant it out of direct sight with the military mounting and offensive close to the factory. I want to make the view work for a monster sighting! :)
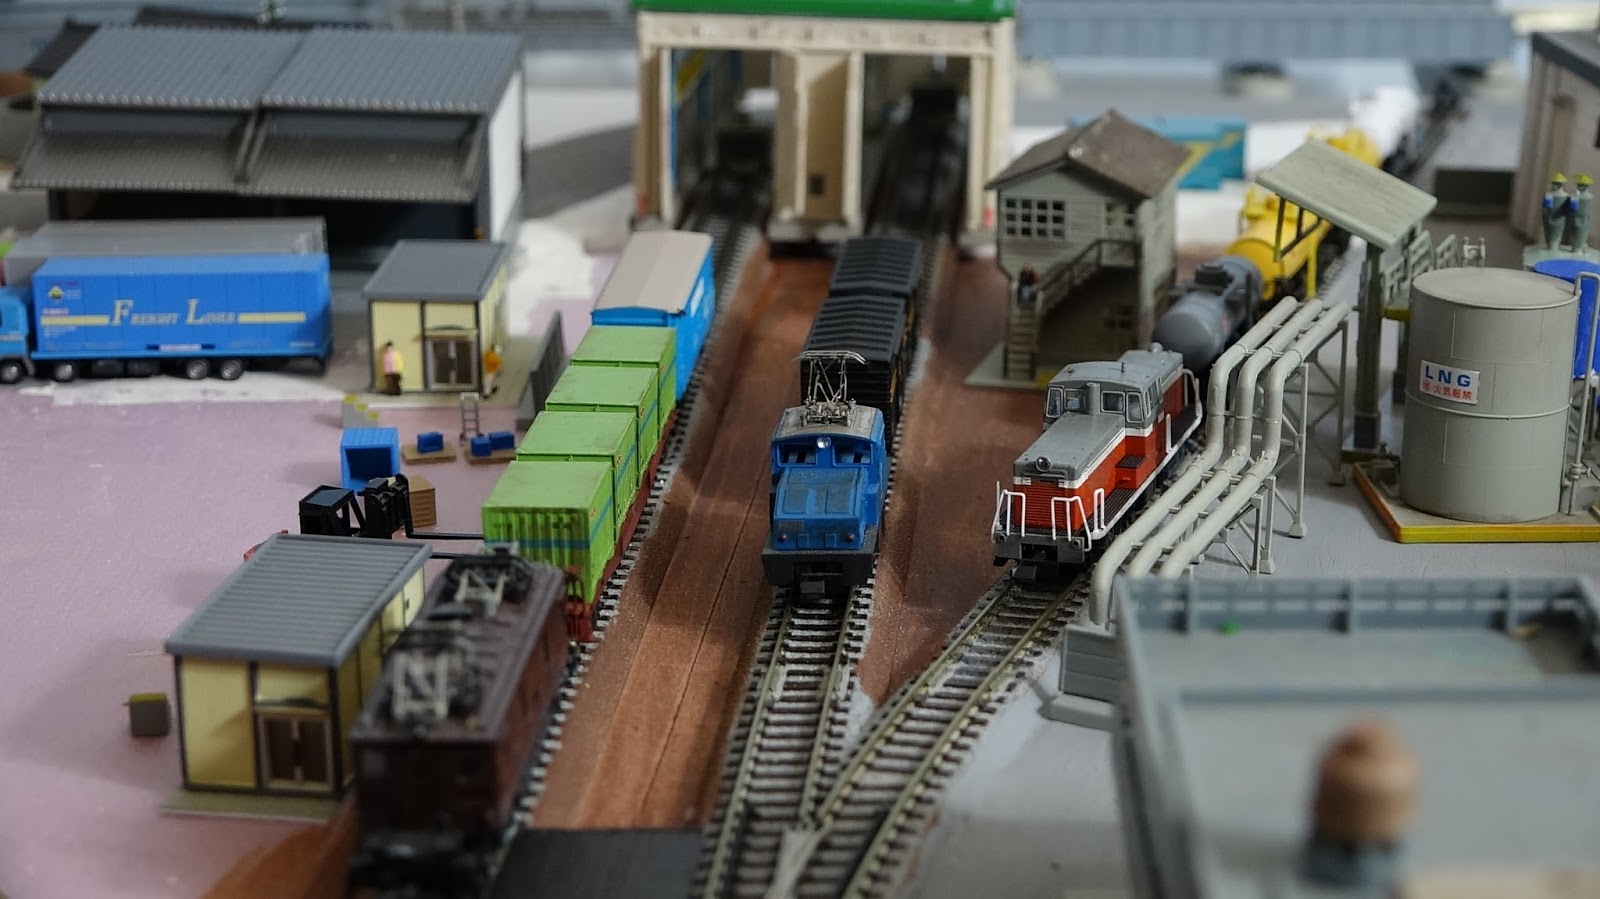
Smaller details are starting to roll into the Soyokaze and Shizuka sections. I want more signs, tourists and plan on making a go at street markings soon as well.
I managed to get some down time in here and there during this week. I was trying to stay sane. :)
I had to come up with a way to deal with the back corner of Kiwamura. When I built it, I didn't have the same back space to crawl up into, so reaching the back of the layout was difficult. I had to lean over - leaving a space to place a hand for balance. Not easy. It's hard to lean over five feet on one hand.
I had a few suggestions on how to address the space. The best backed up my own thought - build something to drop into the back space instead of trying to build in the back space itself.
I carved and built up a hillside with foam and then covered it with plaster gauze. It worked like a charm
Foam covered with plaster....
A little paint and some Woodland Scenics....
A little walking view spot....
Not bad.
I'm pretty happy with the results. When I get the additional trees in, we'll be golden.
I also started to work on additional details. Like the hillside apartment complex area.
I also checked out the plastic fencing I purchased a while back. I wasn't sure it was going to be as good as the laser cut metal fence I had, but it's not bad. It doesn't read as plastic. And, it's FAR less expensive than the laser cut metal fencing. It's worth being a little more cleaver about using the plastic - I can get three packs of the plastic for the same cost as one metal laser fence pack.
The military is also snooping around the factory. I think there may be something wrong there. :)
I wanted to make the corner of the Kiwamura Station curve a little more....realistic. It needed something to look like a bridge. I thought I'd try another styrene build.
The first round of painting is done. I just need to go back in and add some weathering and additional details. Maybe some additional supports under as well.
Overall, I'm happy with the progress. These are the little details that I love working on. I want to make sure that I don't go too fast. That I'm thinking through the building of these details properly so that I don't get ahead of myself.
I'd love to get additional trains to run - something basic. I wanted to get the N•EX train, but I don't think it will run on my curves. I might still get it and hope it works. I can always resell it on eBay if need be.
I had started a building kitbash a while back and had liked the progress at first, but then it started going off the rails and I figured that I'd just end up ditching the project and starting in on another later or just doing some checkbook modeling to complete Shizuka's skyline.
However, my friend Rios Tam said that he liked the design and suggested that I keep going with it. I sat with it a while, but was inspired to complete the project.
The main issue I was having with the building was the disjointed nature of the building. The design was ok, but there were too many things going on with it. The base was a Pringles chip can, there was a cap placed on from another container, then I purchased some colored plastic to make windows with. I used some Woodland Scenics puffy tape that I used with their Smooth-It material to make some interesting rings around it. It was...ok. Not great.
So, I wanted to unify the whole of it. I masked off the windows and re-sprayed the whole of the building and I liked it MUCH better. It didn't look so....patchwork.
I sat with the building again and thought about the details and styles I could apply. After looking through some of my reference photos, I started in again.
The building needed an entry, some flash, and some other items to break things up and make it a little more "real world". I popped a base into play, got some stairs in there and some signage and it was looking much better.
I was starting to see the light at the end of the tunnel at this point. Sadly, some of these closeups revealed a lot of issues with the the build out - things that I needed to deal with and things that I need to avoid taking photos of. hehehe What it needed now was color.
Drag - I used Gorilla Glue for the first time on the overhang and didn't know it puffed up while drying.
I detailed out a few other areas like the rooftop and the base to get a little more of that Real World feel to the project. I think it made a huge difference for me. A great use of spare parts and pieces I kept instead of tossing out.
So, I'm pleased with the build out overall.
I've learned a lot overall. That alone makes this a major success for me. Pushing through instead of quitting was grand as well. It's really the changing point for this project. I'm looking forward to future projects of this nature to see if I can up my game yet again. This building turned out FAR better than my other efforts.
I believe I spent about 6 hours on this in total over a span of about three or four months off and on.


